
Add a customer
Create a customer record with Quick Consumer Create, so you can start a list for someone you're helping on the floor or on the phone.
Quick Consumer Create adds a customer from the Customers page with a name, an email and, if you have it, a phone number. By default it also sends them a welcome email with sign-in instructions for your website.
Steps
-
In the sidebar, select Customers.
-
Select the round purple add customer button at the bottom right of the page.
-
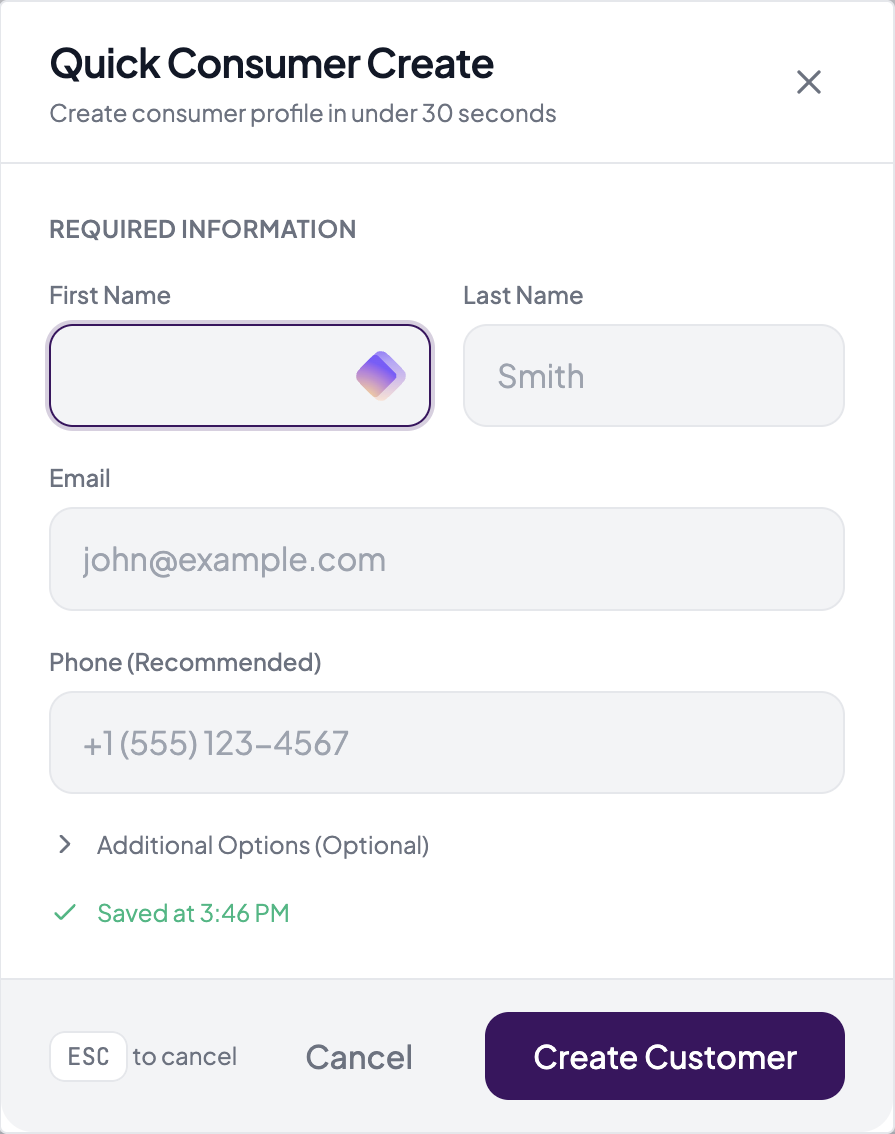
Type the customer’s First Name, Last Name and Email. All three are required.
-
If you have it, type their Phone (Recommended).
-
If you don’t want to email them yet, open Additional Options (Optional) and clear Send welcome email.
-
Select Create Customer.
Good to know
The welcome email
- Send welcome email is ticked unless you clear it. With it ticked, you’ll see “name created — welcome email sent”.
- Your account’s notification address also gets an email about the new account.
- If they never sign in, you can send it again with Resend welcome in the customer’s panel.
Additional Options
Additional Options (Optional) also has:
- Account Type: Consumer, the default, or Trade Professional.
- Internal Notes: an optional note for your team, up to 2,000 characters. It shows under Notes on the customer’s Overview tab. You can’t change it after the customer is created.
If something goes wrong
- A missing name or email, or an email that isn’t valid, shows a message under the field.
- If the email is already on your account, you’ll see “Customer with this email already exists for this showroom”.
After you add them
- The new customer starts Unassigned, not with you as their salesperson.
- The Customers list shows 50 customers a page. If you don’t see the new name, search for it.
- To start a list, open the customer and select Create list in their panel or on the Lists tab.
Other details
- To leave without adding anyone, select Cancel, the X or press Esc.
- Staff, Marketing, Manager and Admin users can all add customers.
- The add customer button isn’t there in the Master view or while Privacy mode is on.